Until now, Bito’s code review agent supported cloud-hosted setups for GitHub, GitLab, and Bitbucket. Self-managed options were there for GitHub and GitLab, but Bitbucket self-managed was missing.
We’ve heard the requests. That changes today. You can now run Bito’s AI Code Review Agent with your self-hosted Bitbucket instance.
If your team works in a secure or air-gapped setup, this gives you full control without giving up the speed and quality Bito brings to your PRs.
Let’s walk through how to get it running.
Setting up Bitbucket (Self-Managed) with Bito
You can now connect Bito’s AI Code Review Agent to your self-managed Bitbucket server. This setup allows Bito to access your private repositories and run AI-powered code reviews directly on your PRs.
Here’s how to set it up:
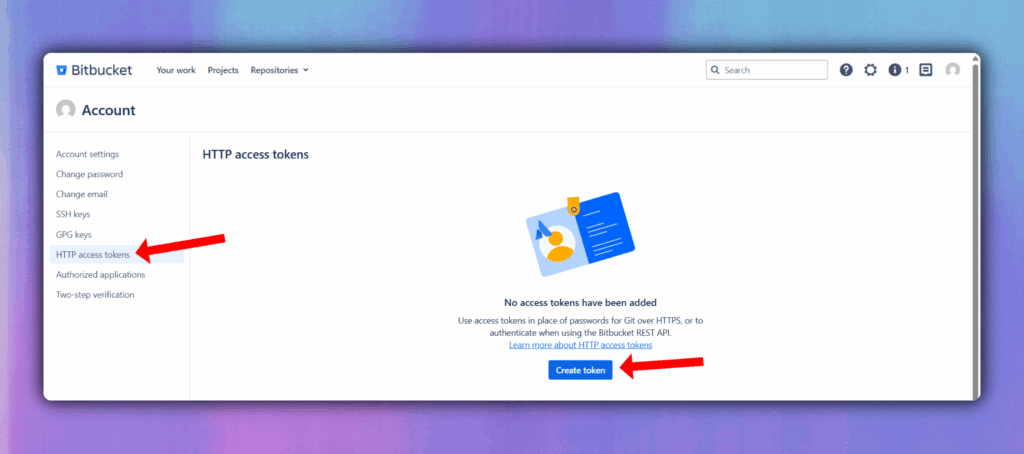
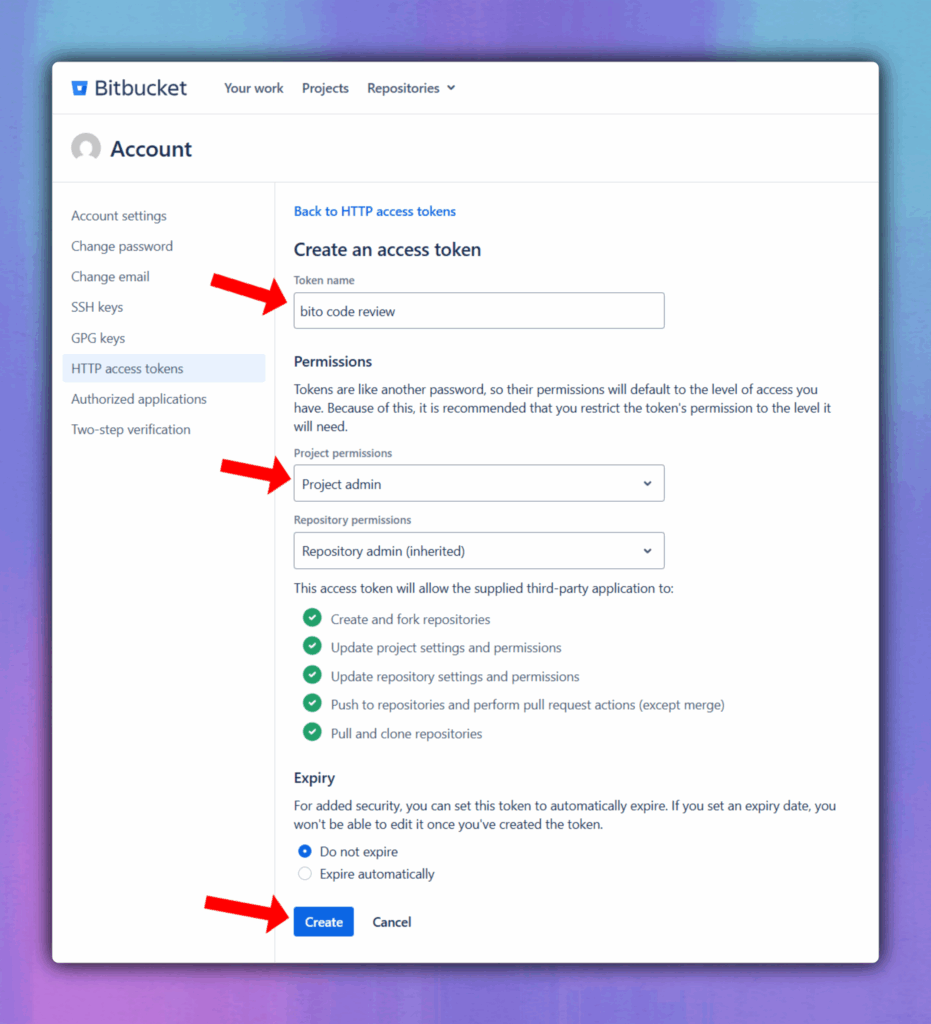
Step 1: Create a Bitbucket Personal Access Token
To connect Bito, you need a Bitbucket token with Project Admin permission. Make sure the token is created by a user with Admin privileges.
To create the token:
- Go to your Bitbucket instance
- Click on your profile picture
- Select Manage account > HTTP access tokens
- Click Create token
- Set a name, select the required permissions, and set an expiry
- Copy the token and keep it secure
If your organization uses SAML Single Sign-On, the token must also be authorized through your Identity Provider (IdP). Otherwise, the integration will not work. Refer to your IdP documentation for how to authorize access tokens.
Step 2: Log in to Bito
- Go to bito.ai and log in
- Select the workspace where you want to enable code review
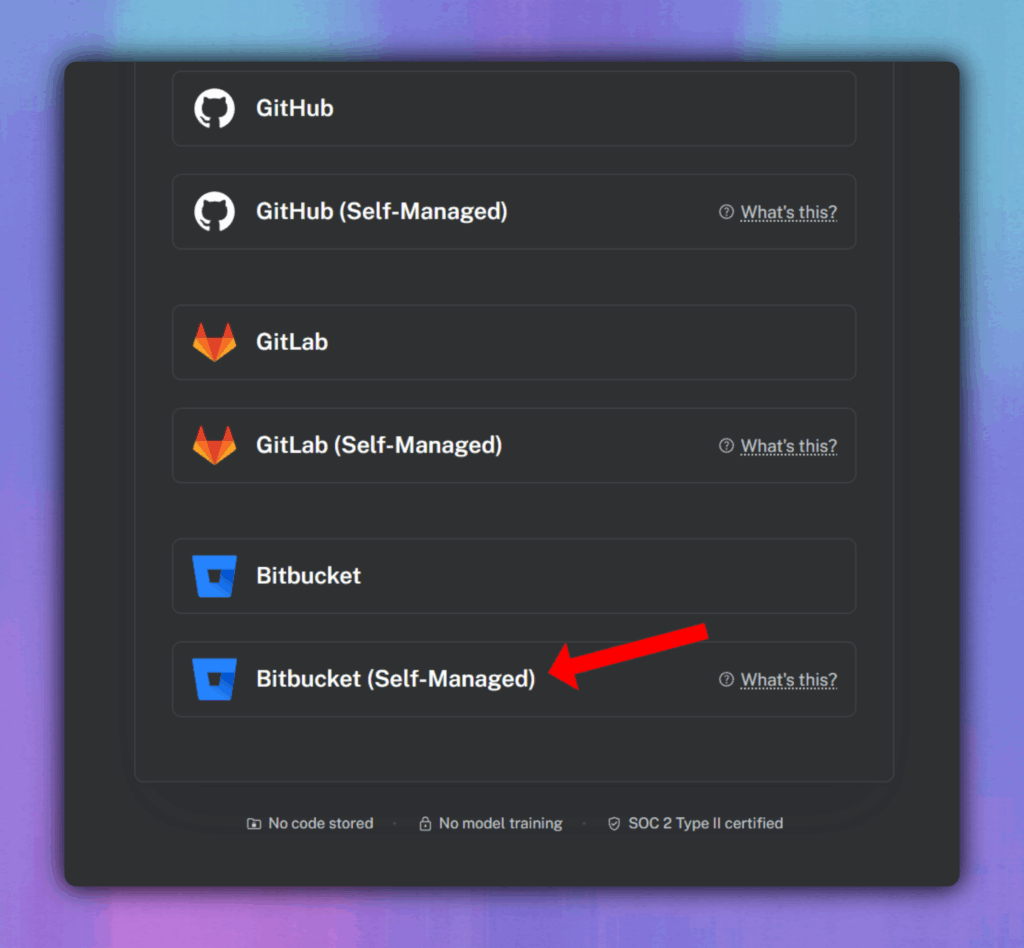
Step 3: Go to Code Review setup
- In the Bito sidebar, click on Repositories under the CODE REVIEW section
- When prompted to choose a Git provider, select Bitbucket (Self-Managed)
Step 4: Connect Bito to your Bitbucket server
You’ll be asked to enter:
- Hosted Bitbucket URL: This is the base URL of your self-managed Bitbucket server (e.g., https://yourcompany.bitbucket.com)
- Bitbucket username: The username associated with the access token
- Personal Access Token: The token you created earlier
If your Bitbucket server blocks external services, you’ll need to whitelist Bito’s gateway IPs to allow access:
- 18.188.201.104
- 3.23.173.30
- 18.216.64.170
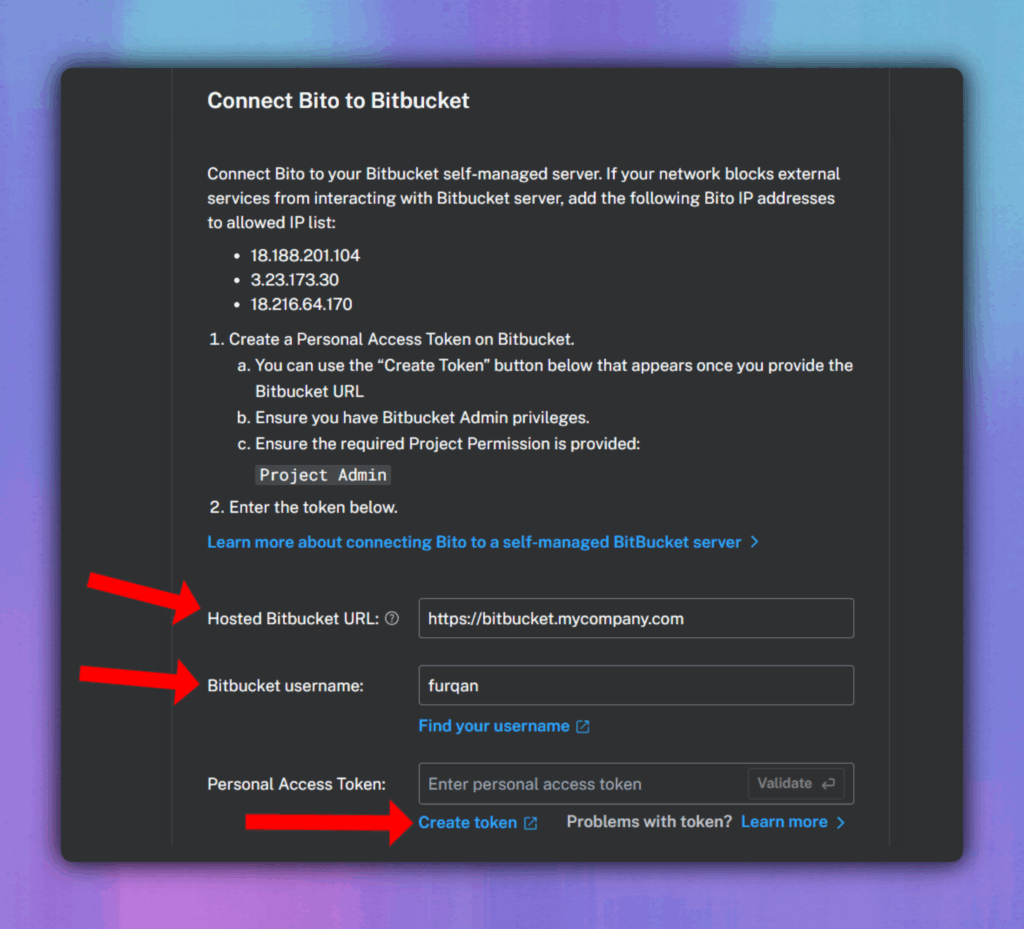
Once you’ve filled in the fields, click Validate to verify the connection. If successful, click Connect Bito to Bitbucket to complete the setup.
Step 5: Enable repositories for review
After connecting, you’ll see a list of repositories from your Bitbucket server. Use the toggles in the Code Review Status column to enable or disable Bito’s AI reviews for each repository.
You can also create custom Agent configurations if you want different settings for different repos.
Conclusion
Bitbucket self-managed support is now live. If your team runs Bitbucket behind a firewall, you can finally bring AI-powered code reviews into your workflow without giving up control or security.
Setup takes just a few minutes. Once it’s connected, Bito will start reviewing your pull requests with context-aware suggestions, summaries, and inline feedback — directly inside your repo.
If you’re already on Bitbucket, this is your sign to give it a try. And if you’re on GitHub or GitLab, you’re invited to the party too.